

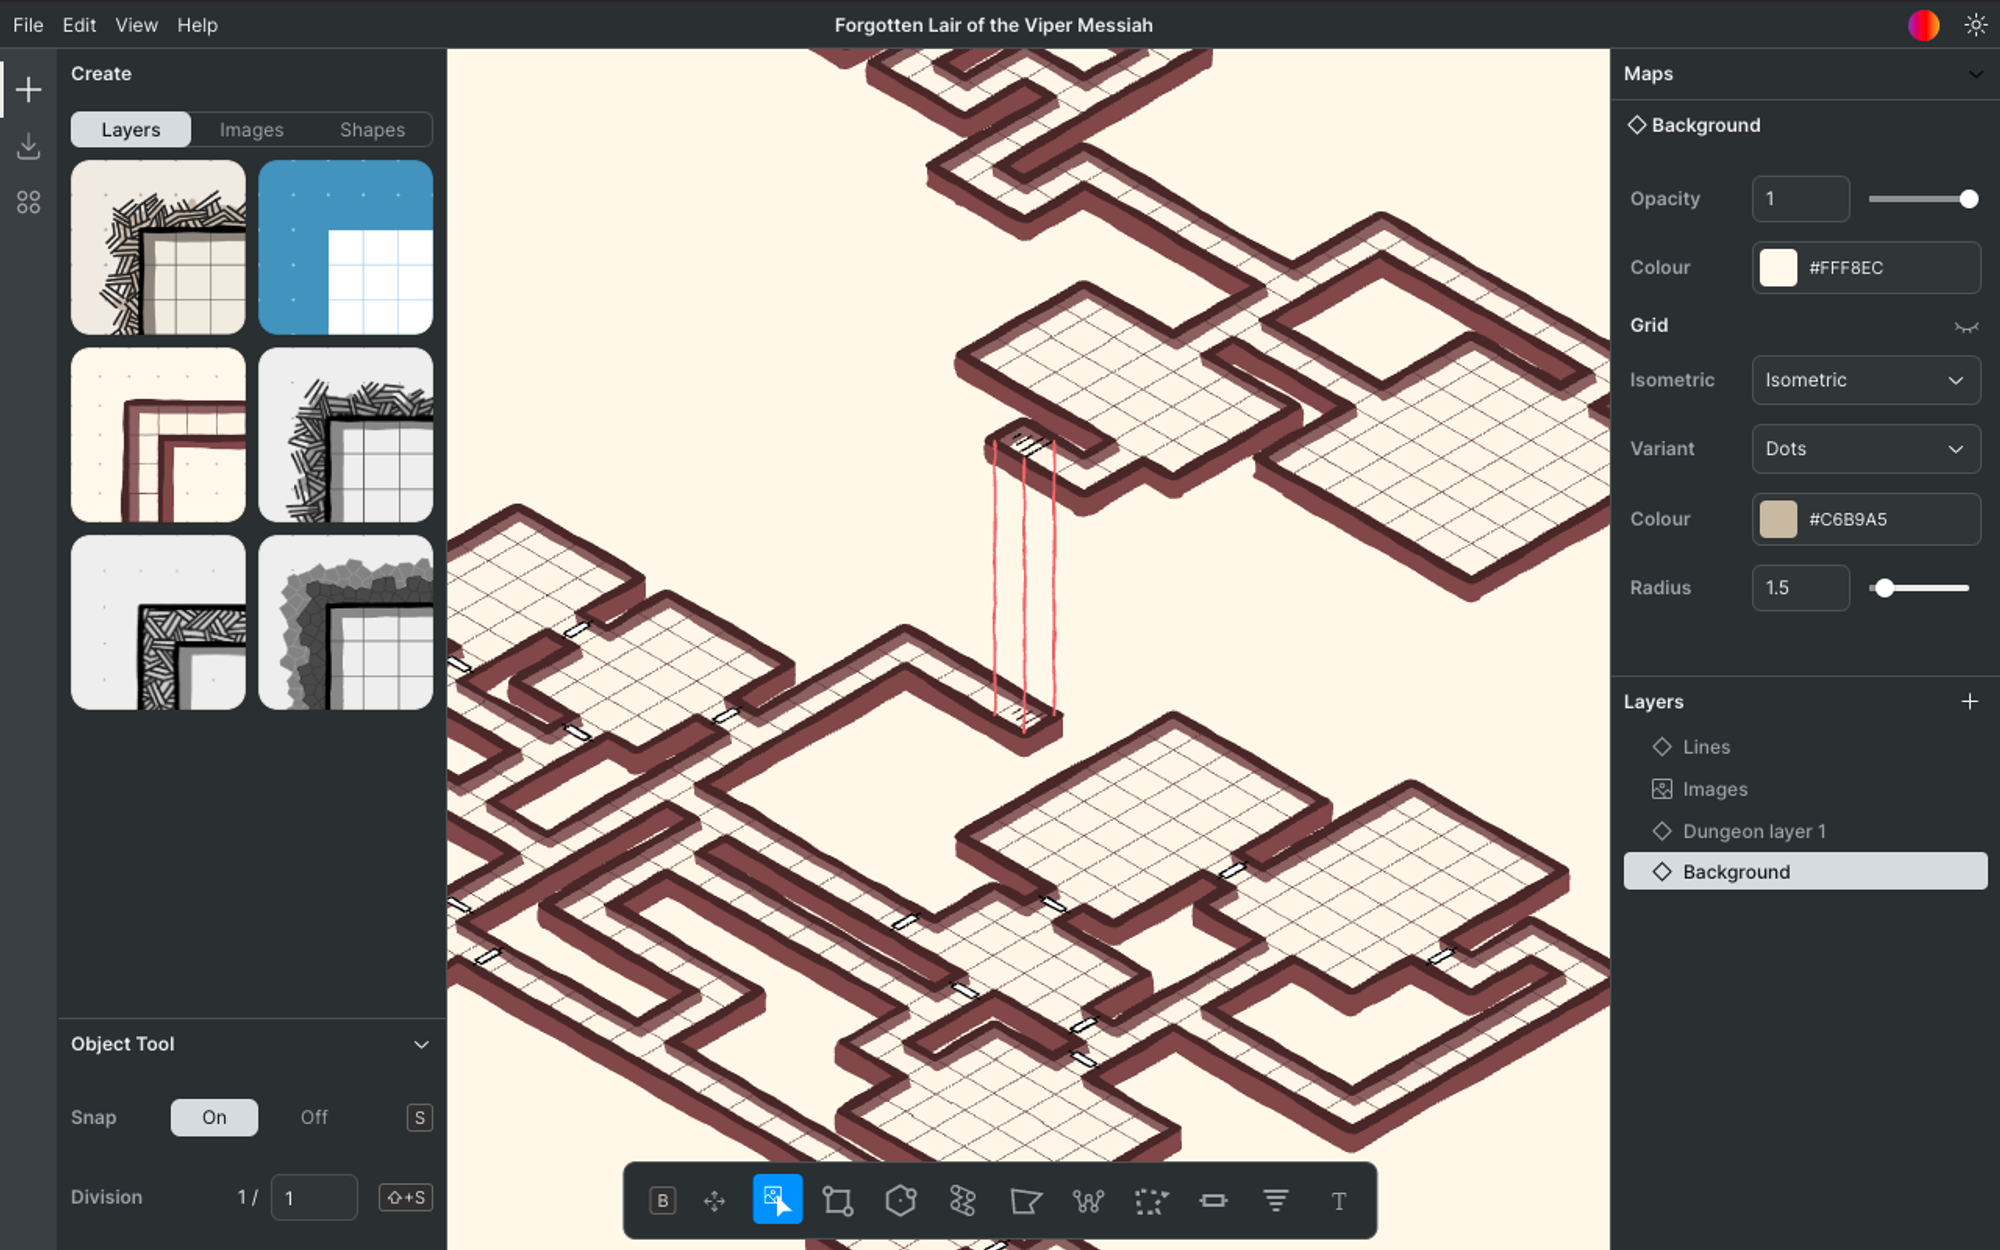
A much-loved feature of Dungeon Scrawl V1 has now reappeared in Dungeon Scrawl V2 - isometric mode! Isometric maps convey depth and verticality in your D&D locations that is harder to express in a top-down map.
You can of course get the best of both worlds by providing both the top-down and isometric versions of a map, to give players the sense of depth while preserving the ease of a top-down square grid.
Luckily, this is easy to do in Dungeon Scrawl. You can switch any map in and out of isometric mode with ease, and export both as images or PDFs to have side-by-side in your adventure. Let's see how!
How to enable isometric mode for a map
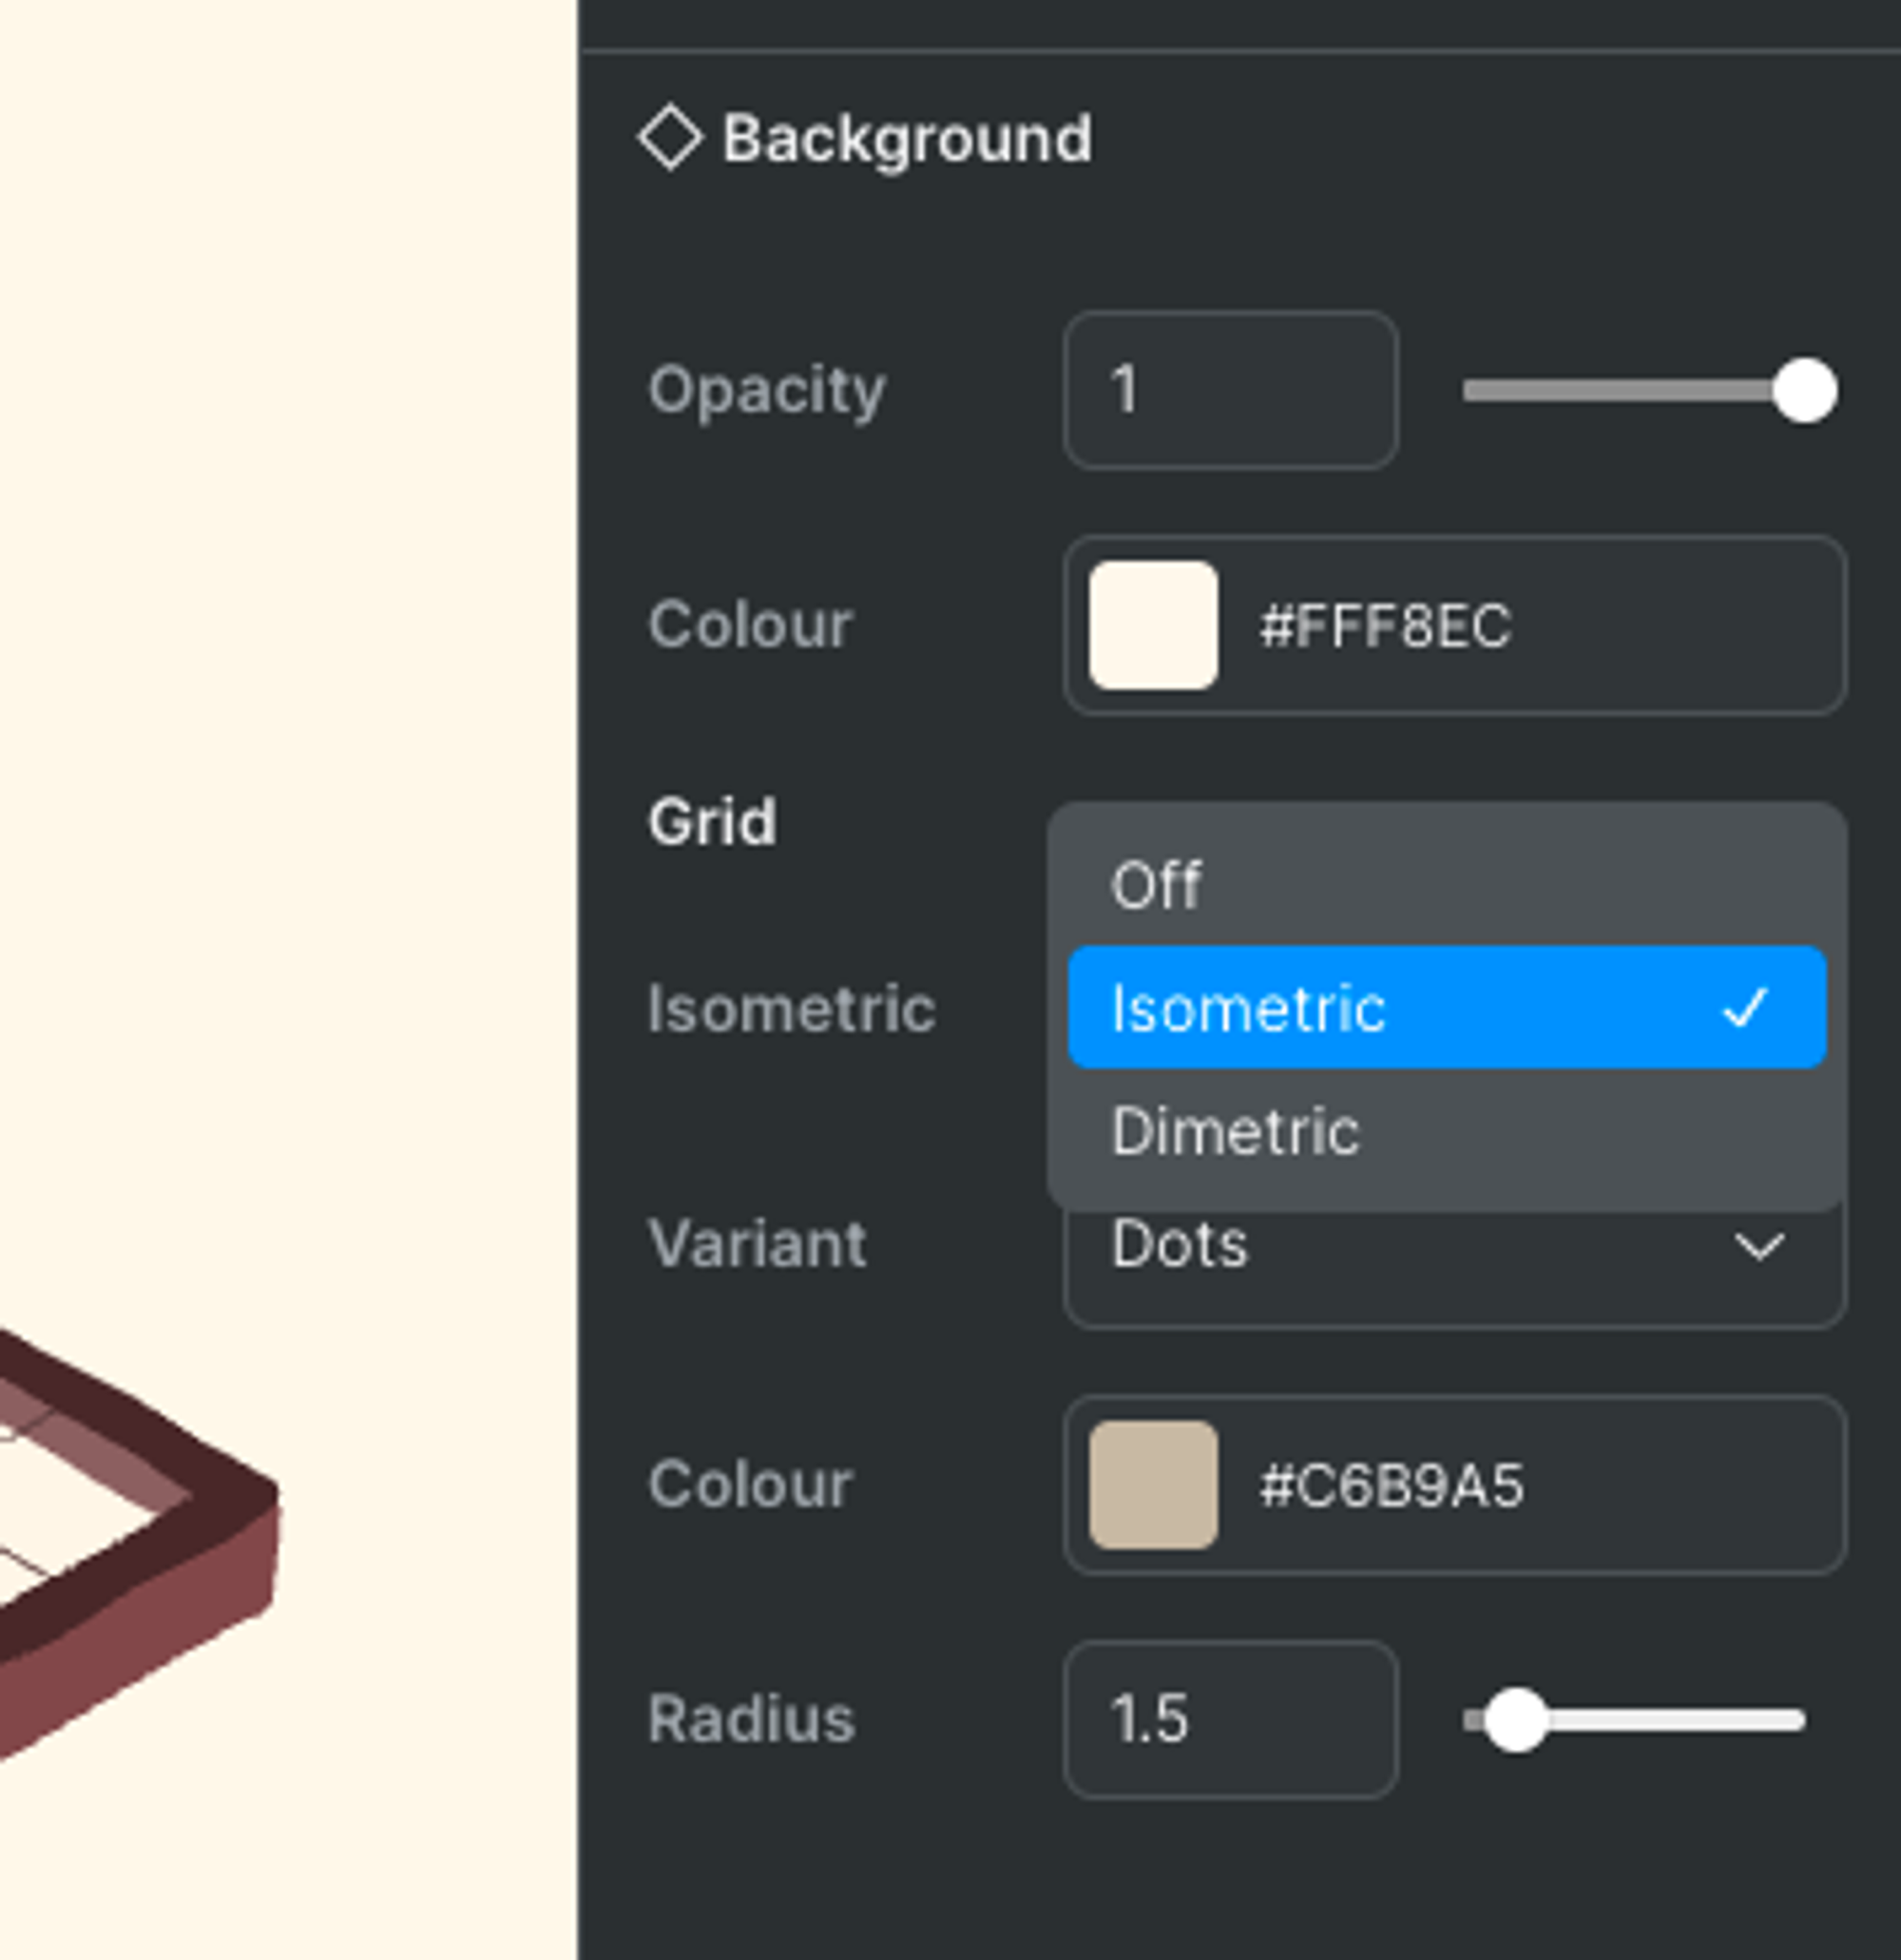
Isometric mode is applied to a whole map at once. You can turn it on from a map's background layer, in the bottom right of the layers menu. If you have multiple maps in your save file (via the maps menu in the top right), isometric will only be enabled for the maps you choose.
You can tweak, edit, and export your dungeon as normal while in isometric mode, and you can flip between top-down and isometric by coming back to this menu and turning it on and off.
What's Dimetric?
Dimetric is a slightly different projection to isometric - try switching between isometric and dimetric to see the difference. Some isometric asset packs will actually use the dimetric projection (and in fact the Dungeon Scrawl V1 'isometric' mode was dimetric for a long time).
Editing the isometric map
Here's a collection of advice, tips, and tricks to get you started with editing isometric maps in Dungeon Scrawl.
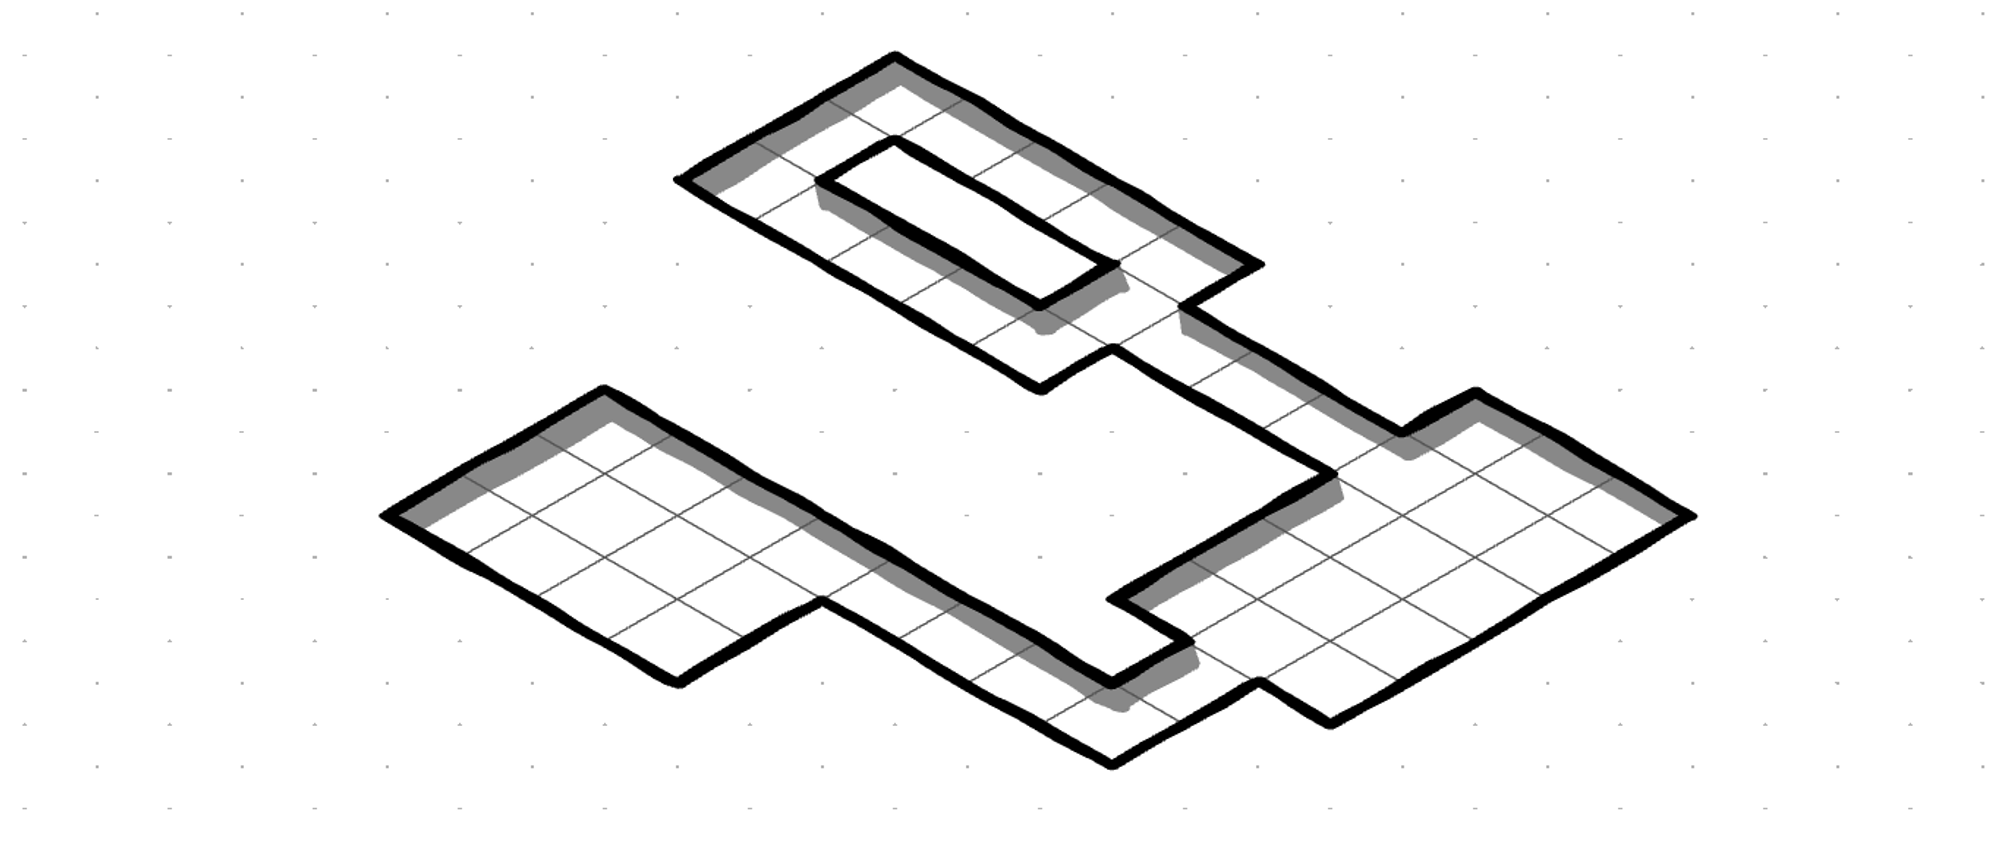
Create depth with the shadows layer
The "shadow" layer isn't just useful for shadows. Used in the right way, it can add depth to your dungeon floor.
Here's a comparison of without an external shadow layer:
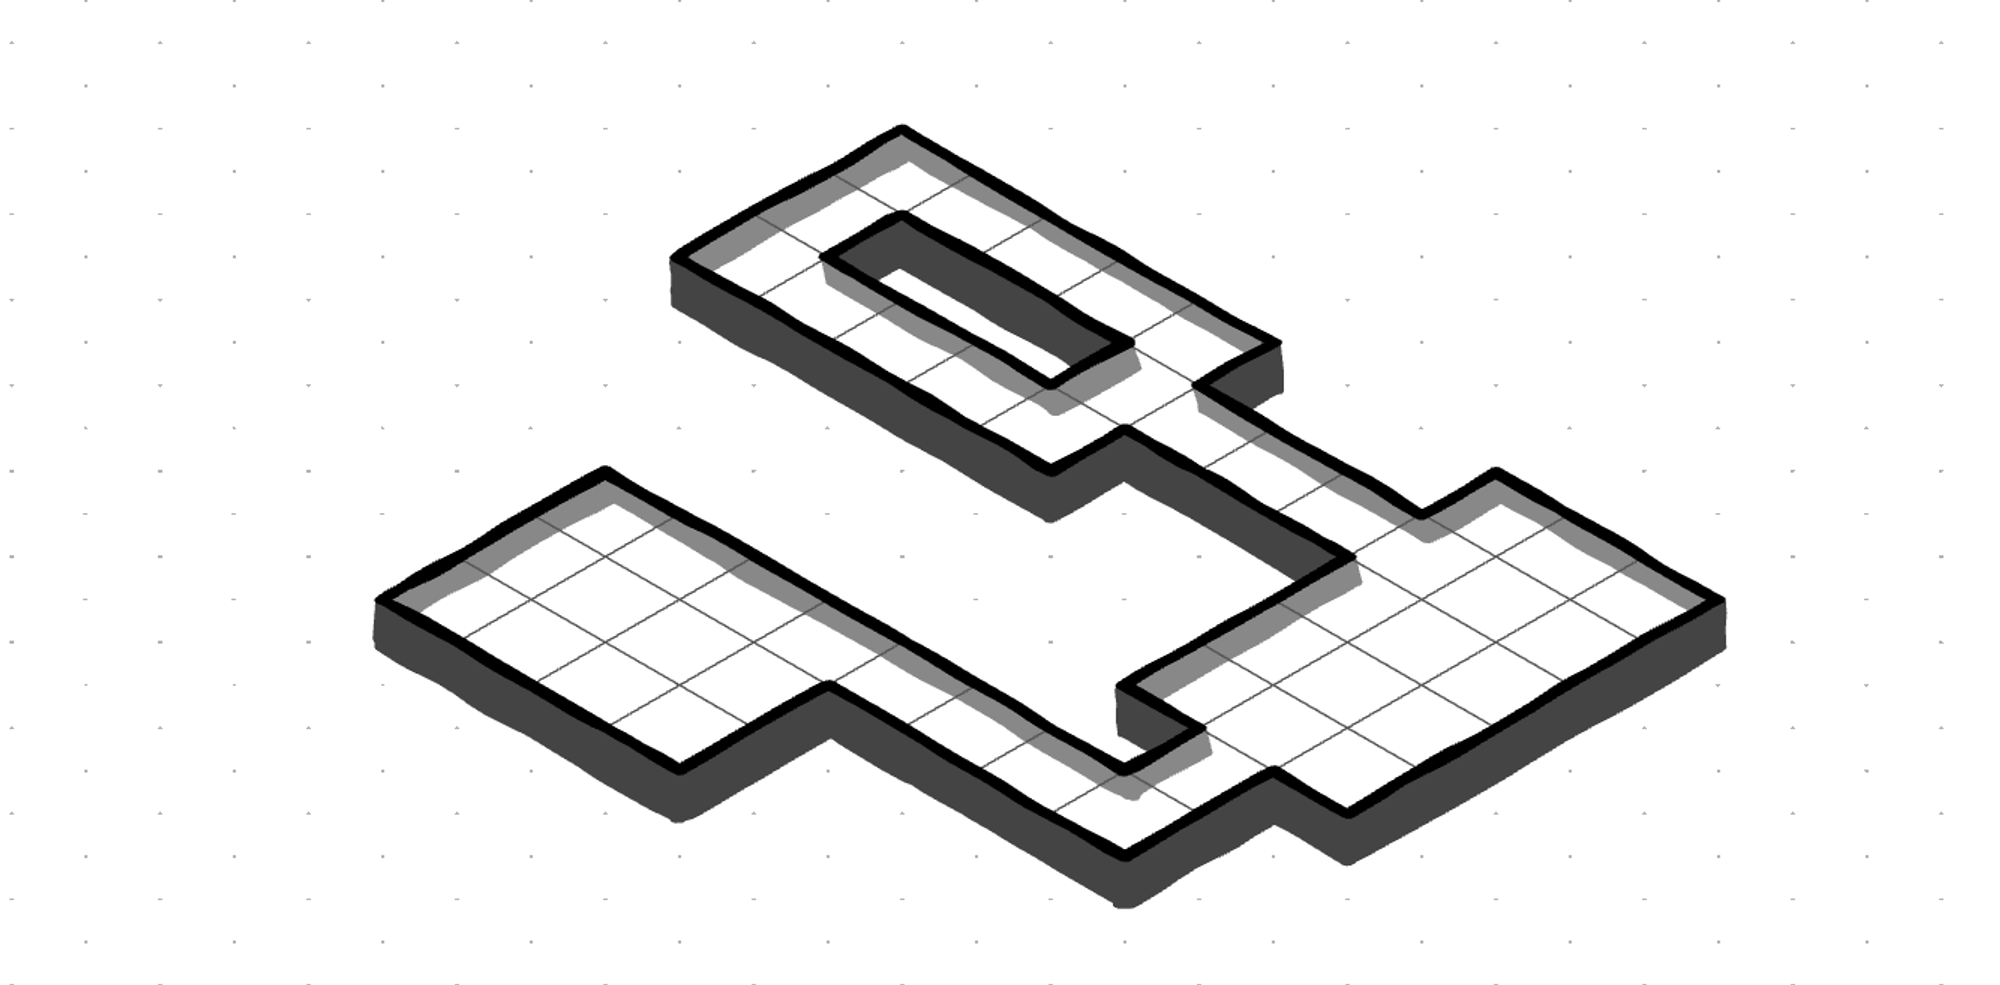
VS with an external shadow layer:
Here's what you'll need to do to create this effect:
- If you haven't already, unpack your dungeon layer to get access to the sublayers. Open the layer in the layers menu using the arrow. If your layer has shading or hatching, delete those layers or toggle their visibility.
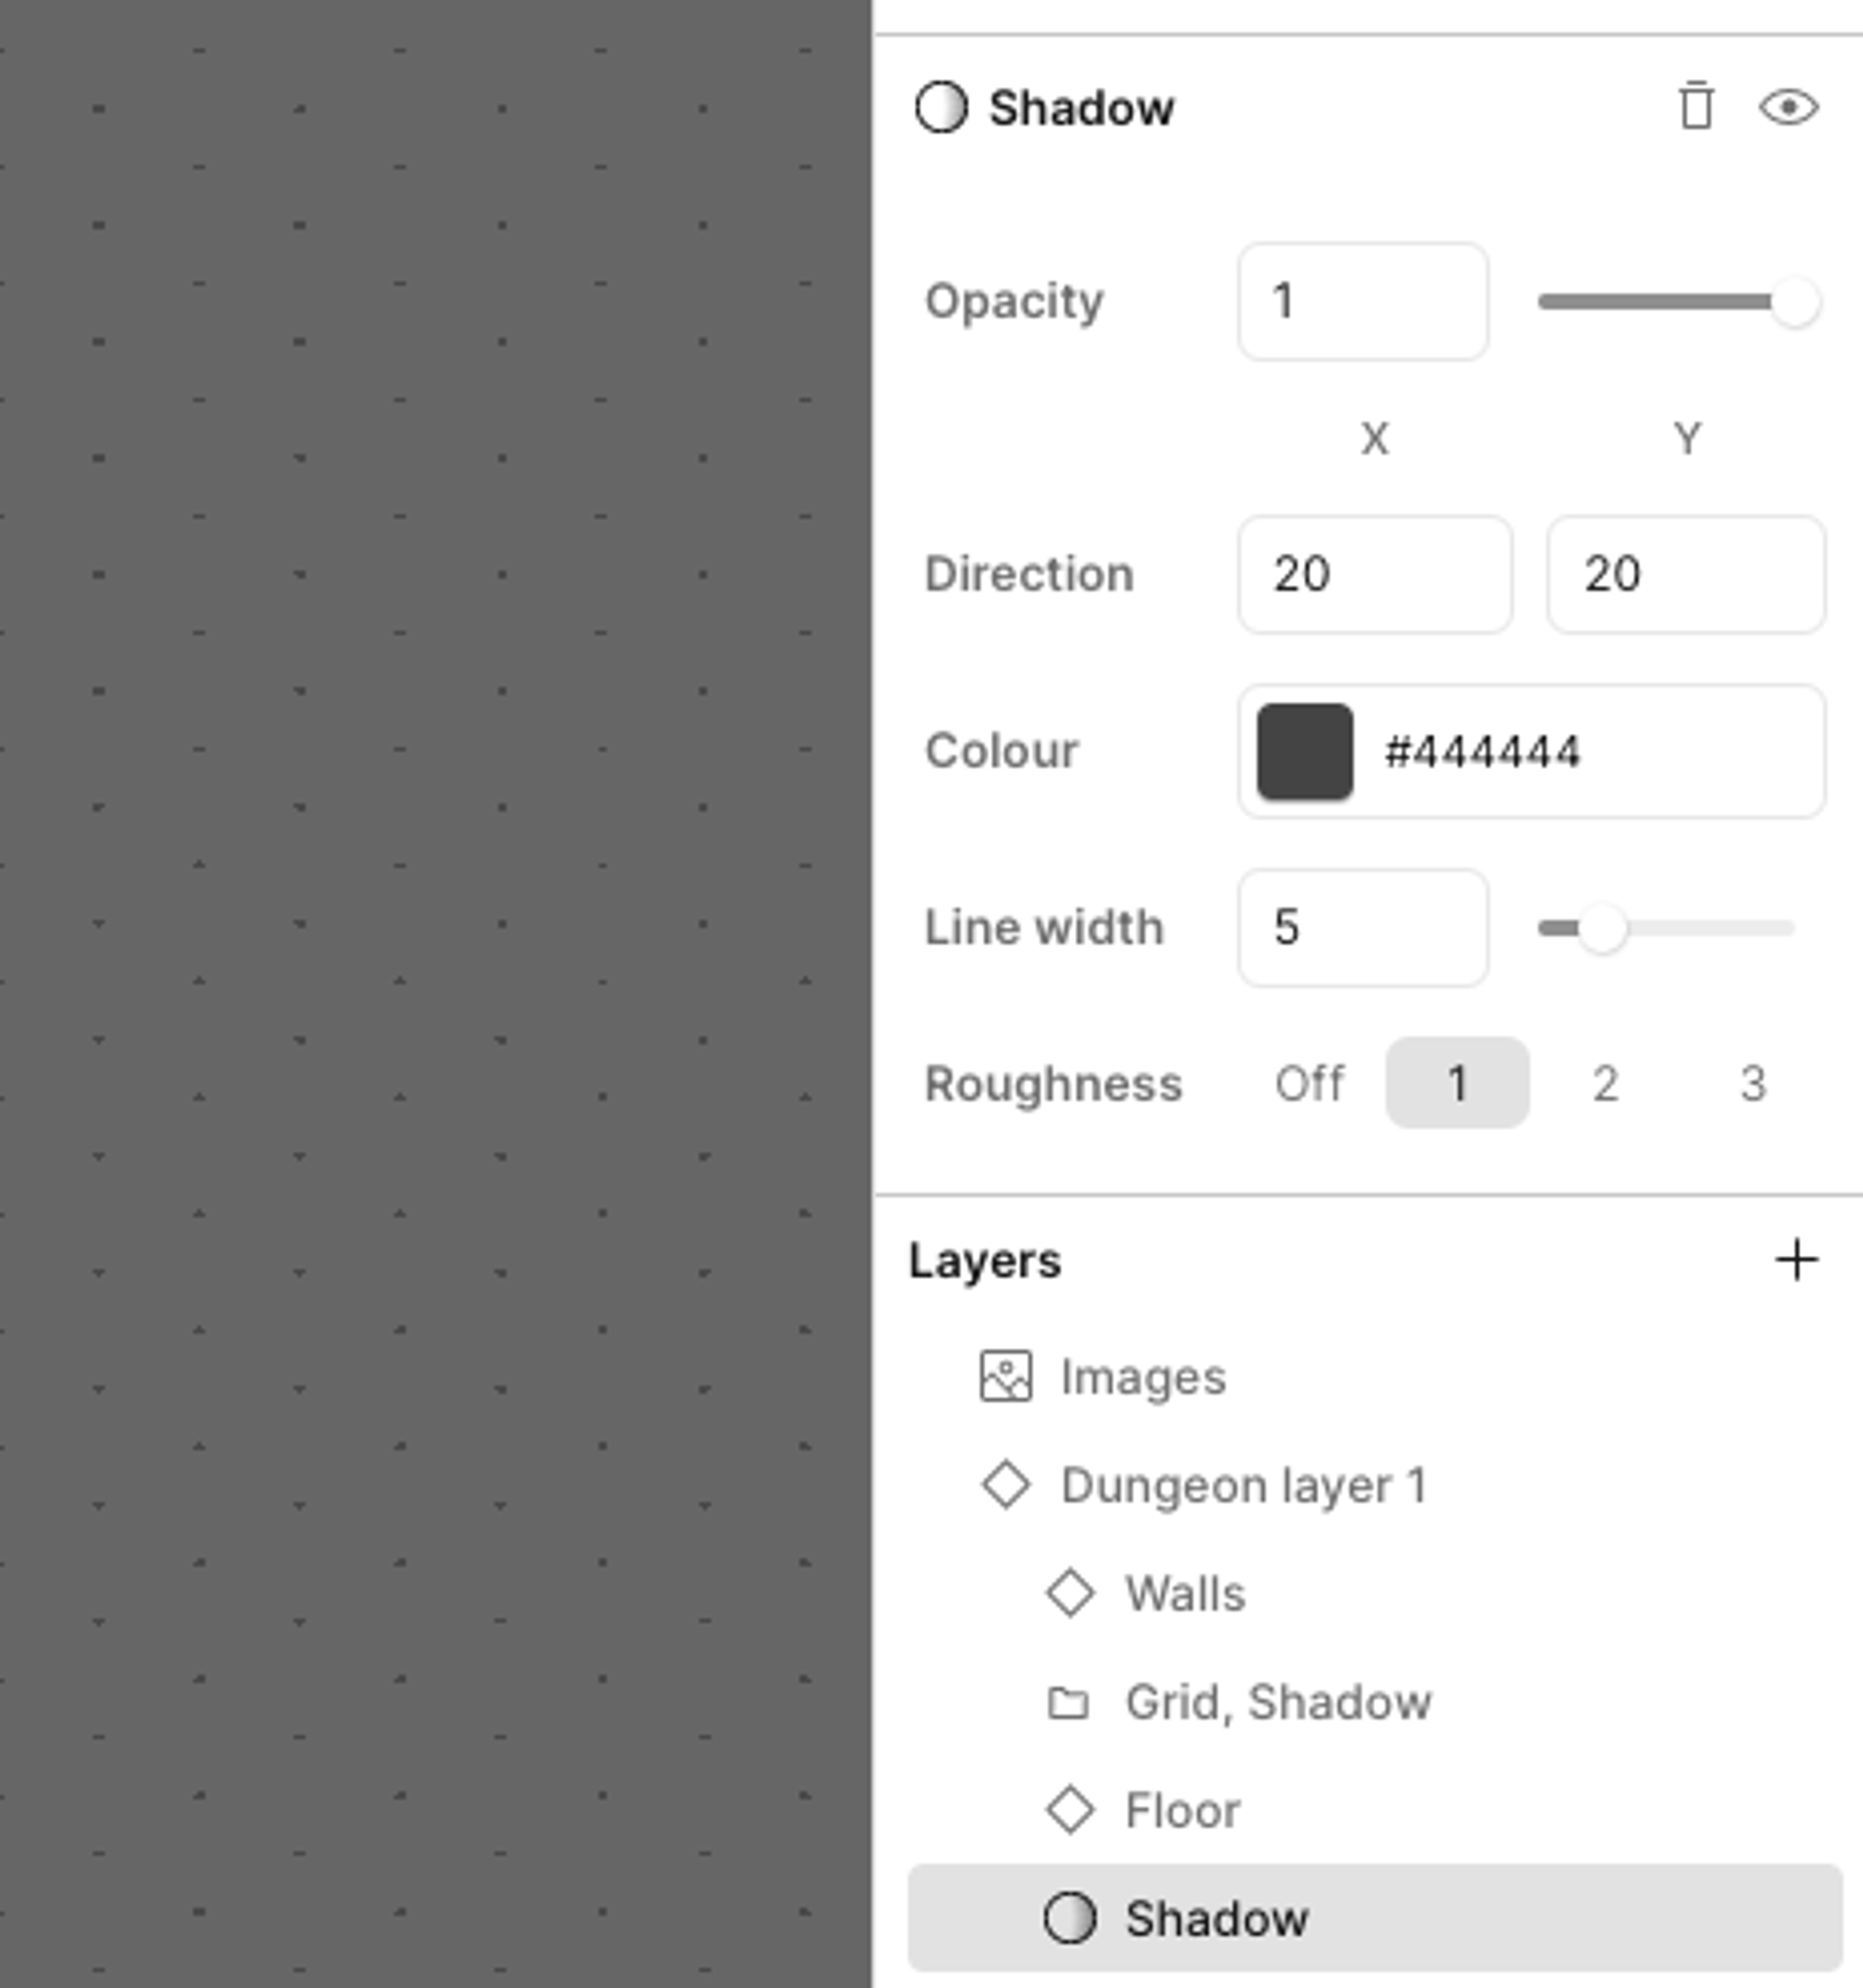
- Use the plus button in the top right of the layers menu to add a shadow layer (it's under the advanced section).
- Drag the shadow layer into the very bottom of the dungeon layer.
- Modify the shadow layer properties to taste. In the screenshot above, I changed
xandyto 20, and set the color to a mid-gray.
Here's a screenshot of my final layers config:
Use lines to link different dungeon floors
This is a way to help convey verticality in isometric maps. Placing dungeon floors/levels on top of each other helps players to understand the 3-dimensional layout of the space. Portals between the layers (such as stairs, slopes, actual portals) can be linked with lines as a visual aid.
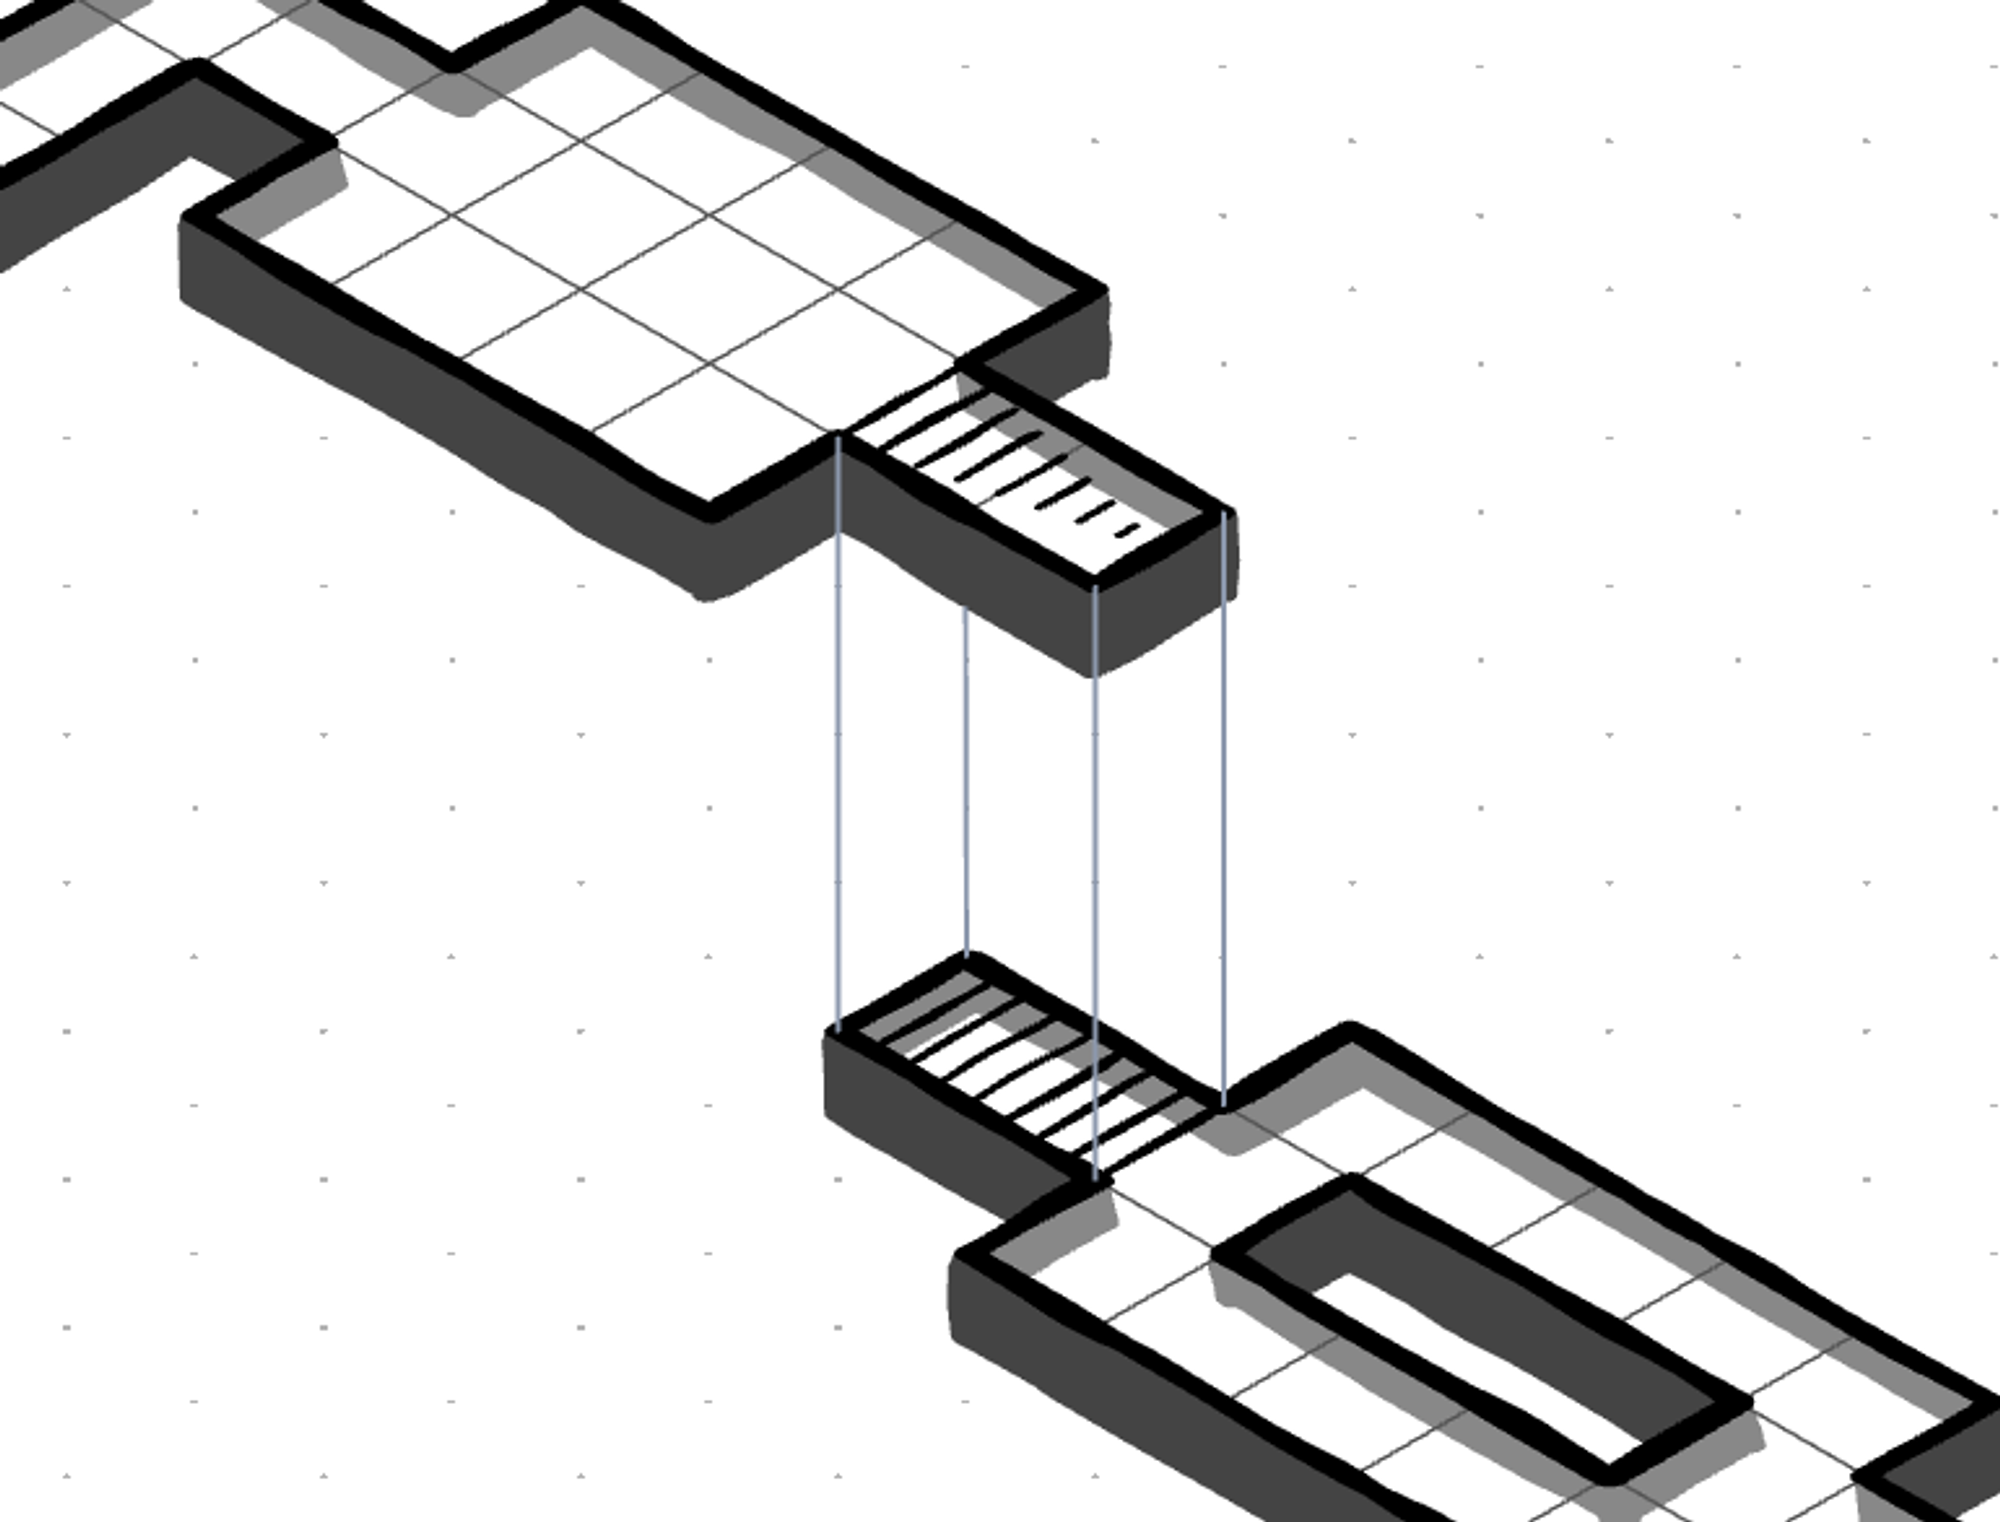
Here's how to do it:
- Create the floors/levels as you normally would using the creation tools, such as the rect tool. Don't worry too much about getting their vertical alignment perfect just yet, we'll adjust that in the next step.
- Align the layers vertically. This is optional, but is a nice touch for stairs, slopes, ladders and the like. Placing the corresponding portals in the same vertical line can be done using the select tool. It's 4th from the right, or
b8using the keyboard shortcuts. Make sure snapping is on, then draw a shape surrounding your upper floor. Cut withCtrl+X, then paste withCtrl+V. You can now drag the shape around freely, so position it in the right place, vertically aligned with the level below. Then press the tick icon to commit the paste.
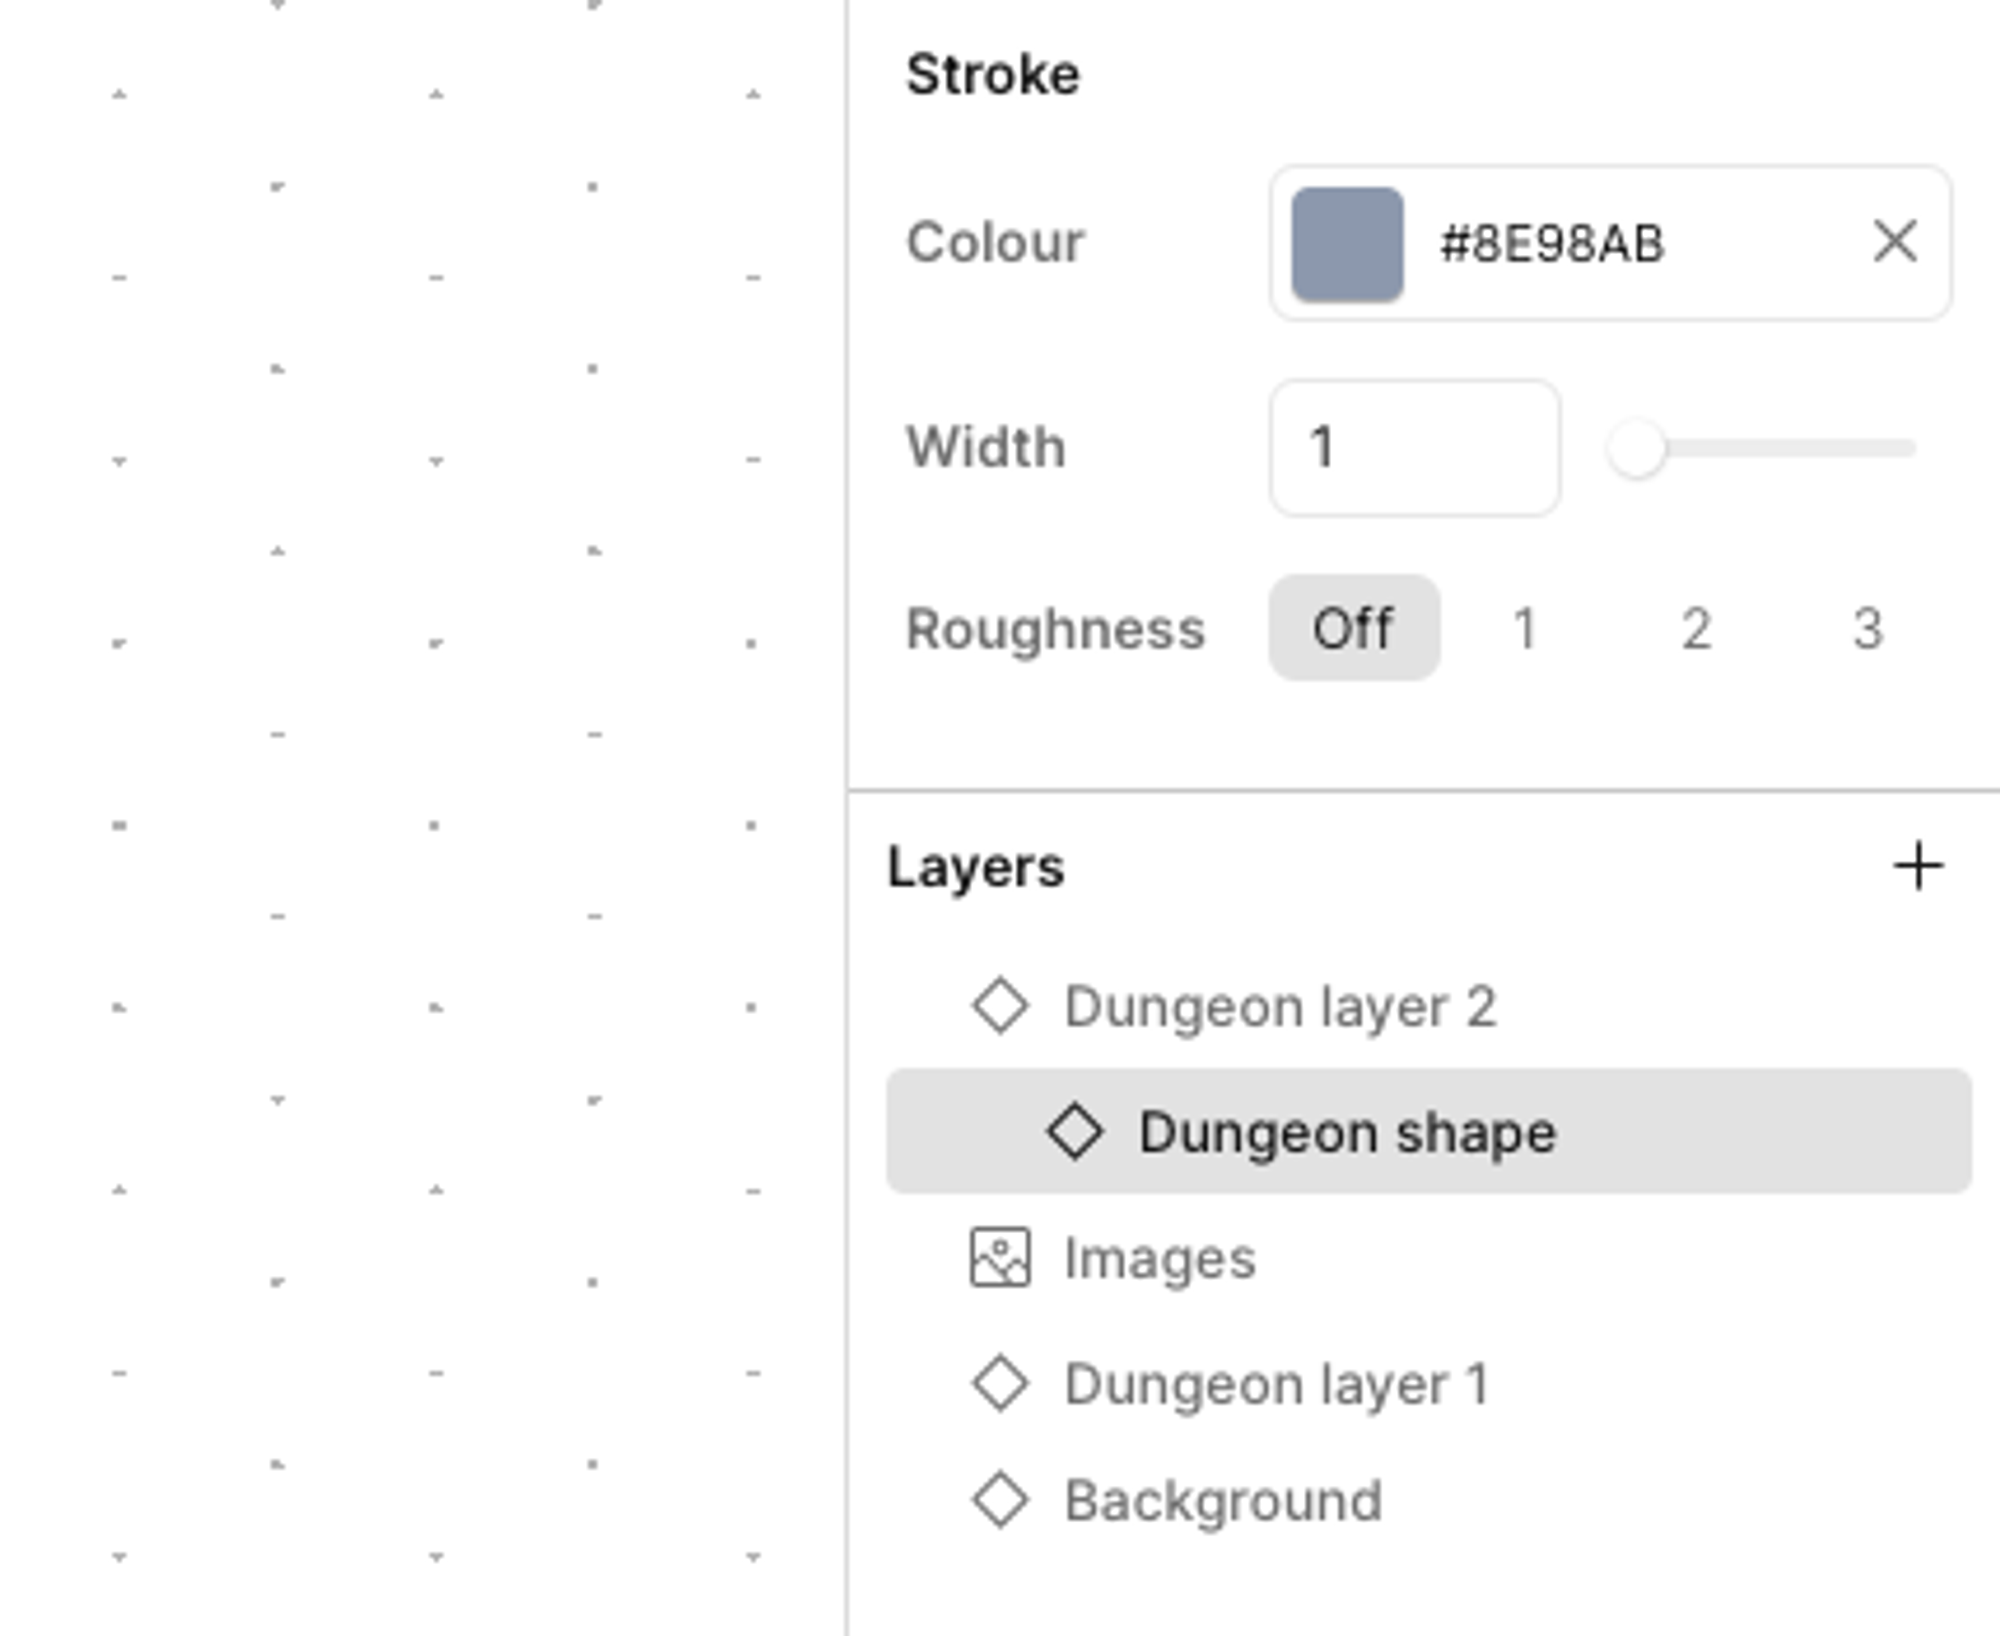
- Create the lines layer. Since our lines need a different style (color and line width) to the existing dungeon layer, we'll need a new layer for it. This time we'll use the plus button in the top right of the layers menu to create the necessary parts. Add a dungeon layer (it's under advanced), then add a dungeon shape layer (also under advanced). Drag the dungeon shape layer inside the dungeon layer. With the shape layer selected, change the properties to
width: 1,color: something light,roughness: off. See the screenshot below for how I have my layers set up.
4. Draw connecting lines between the two levels. I like to connect 4 corners of my stairs/ladder, but that's down to personal preference.
Get inspiration from other isometric Dungeon Scrawl maps
The Dungeon Scrawl community has gone crazy with isometric maps, some people have created some truly impressive structures. Join us in the Dungeon Scrawl Discord to browse through maps and get inspired! The #map-showoff channel has a great collection, as well as #challenge-showcase.
Join the Dungeon Scrawl Discord to share maps, get Dungeon Scrawl tips, and discuss all things D&D!
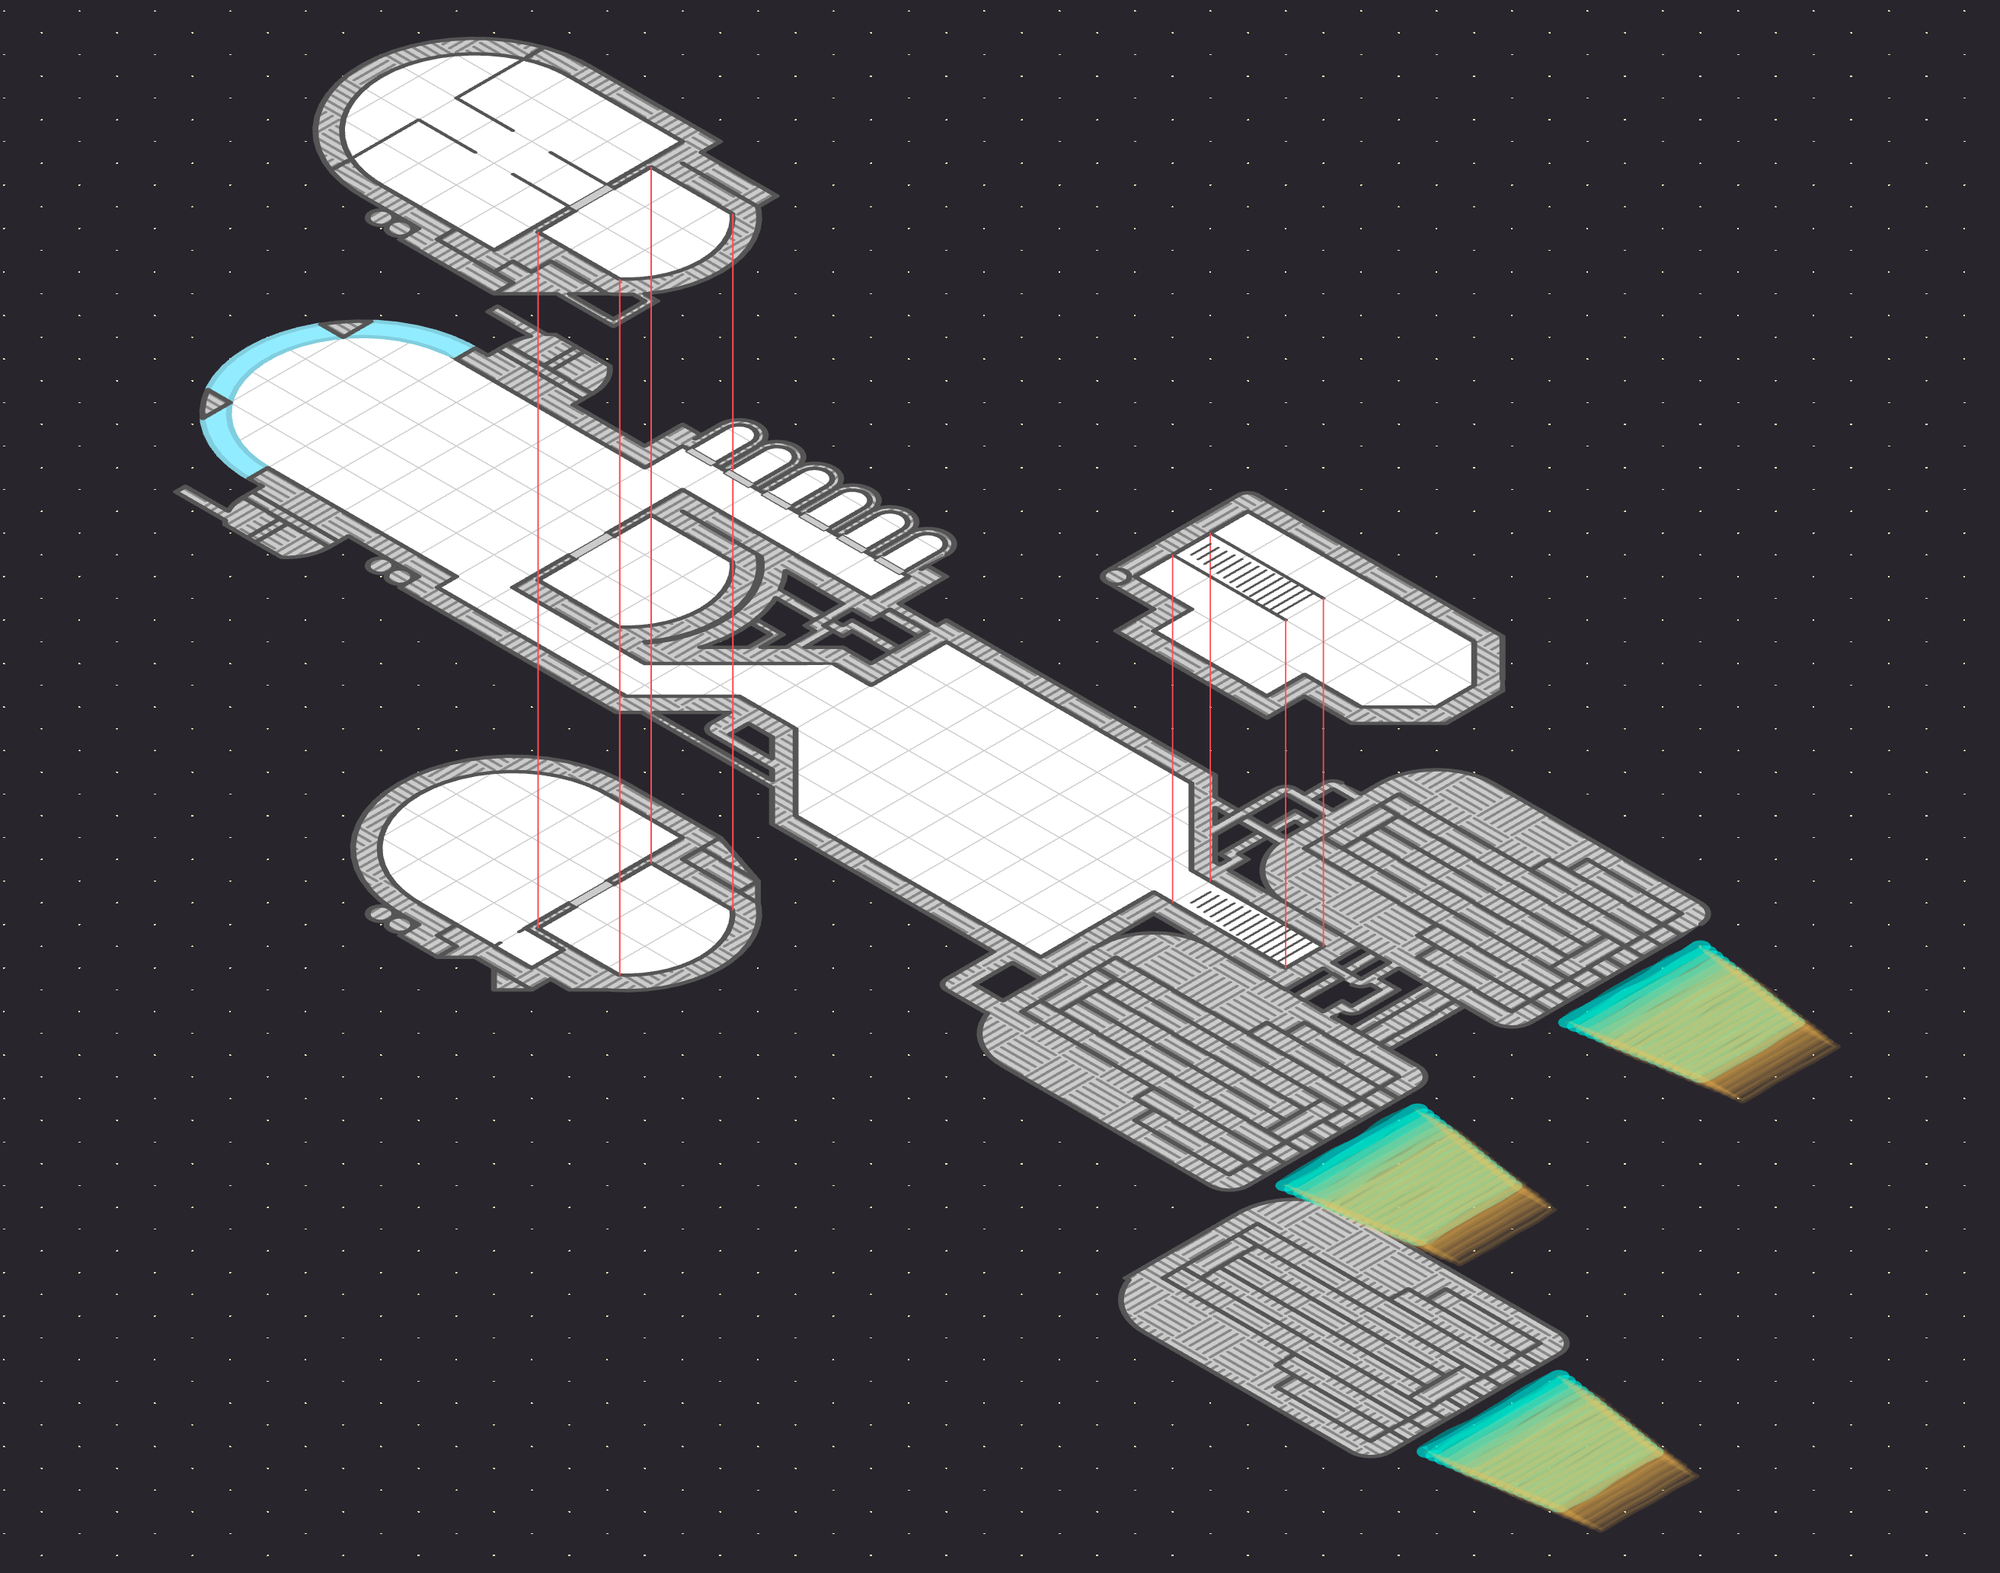
Here's a recent example from EnglishFish:
Experiment!
There's much more you can do that I couldn't fit here, such as using semi-transparent layers for walls. As you get used to isometric, try getting creative with Dungeon Scrawl's layers to see what you can create. Then share it with us in Discord to inspire others!
What are you waiting for, get scrawling!